Automated testing large-scale cloud software at Atlassian

My old team at Atlassian shared a lot of information about the types of tests you can (and should!) write for large scale software development. But more practical tips about how you can actually develop this testing infrastructure is harder to find, scattered across many different conference presentations and documents.

I was Head of Engineering for Confluence from 2012 to 2016, and during this time we evolved the product rapidly while also dramatically expanding the customers we served across both self-hosted and cloud editions of the product.

Today I wanted to share some of my learnings and specific approaches we used in the Confluence engineering team to successfully develop a broad set of automated tests, despite many competing priorities, and ultimately put them to use to support a highly reliable cloud service with millions of users.

1. Start with acceptance (end-to-end) tests, not unit tests

A lot of automated testing HOWTOs start with unit testing as the foundation of your test infrastructure, but our team found our automated acceptance tests far more valuable in catching regressions and validating the behaviour of the application.

An automated acceptance test for us is a test which exercises the live application through a programmatic web browser. Initially, we used JWebUnit, which had a basic HTML-only processor, but over time this expanded to include Selenium and its later incarnation WebDriver. These would drive a headless Chrome-like browser, which also gives ability to test all your JavaScript code.

We called these acceptance tests or functional tests, but I think more recently they are known as “end-to-end” tests instead.

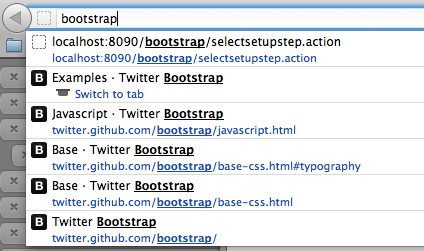
Our acceptance test suite started from the first screen a user sees - the “setup wizard”, stepped through various ways to set up the application, then moved on to a test for each feature in turn. The tests would create pages, demonstrate various forms of content, test the editor, check permissions, exercise admin screens, turn on and off different options.

Occasionally, an earlier test would leave the system in a bad state, resulting in a string of subsequent test failures. These were sometimes tricky to debug, but always turned up critical problems which were important to fix for the stability of the product.

When I started on the team in 2006, we had perhaps 20-30 acceptance test classes, with a few hundred test methods. About 10 years later, we had hundreds of classes with 3000-4000 test methods. These were combined in multiple different suites to exercise the various editions of the product.

We also had a lot of unit tests, but our unit tests turned out to be much less useful than acceptance tests for two reasons:

  • Fragile dependencies on core code - our unit tests used mock and stub objects to test interactions between different services and managers. These were not difficult to write, but maintenance was an issue. Most production code changes required also updating the corresponding mock/test objects. This meant a lot of busywork around the test code which didn’t add value in finding new bugs.
  • Limited scope of testing - the unit tests were great in some areas, like complex business logic in content permissions, but most of the important bugs in Confluence tended to be interaction between disparate components which were not exposed by unit testing.

These drawbacks of unit tests meant we got much more bang-for-buck from our acceptance (or end-to-end) tests. So that was natually where more of our testing investment went. And that meant we found several ways to make writing these acceptance tests much easier over time.

2. Write new APIs for use with automated tests

To speed up tests and make writing them easier, we added a set of “test APIs” which could take care of common test functionality:

  • Resetting the system to a known good state
  • Creating some test data for the test scenario
  • Triggering scheduled tasks on-demand
  • Querying some internal state of the system (e.g. index queue), to make sure behind-the-scenes activities had happened as expected.

To implement the test APIs, we leveraged the dynamic plugin system in our apps, and installed a “func test” plugin at the start of our test run. This prevented accidentally exposing an API to customers with a “delete all data” method, which was actually something we used in our tests to reset the system to a known state.

We built Java wrappers around these APIs so they were easy to call from the test code. That included pretty neat testing features, like the ability for a test to perform some action on the front-end, then wait up to a few seconds to check that the expected behaviour was triggered on the server side.

Automated testing led to us expanding some of the production APIs available to customers as well. For example, we initially had a basic RPC API for creating Confluence pages, which was fairly limited. As we wrote more tests, we needed the ability to test setting a date when creating a blog post. So this was added to the public RPC API in part due to our need to use it for testing.

Building additional test APIs increases the value of time spent on automated testing, as it expands the surface area of your product APIs and also makes writing future tests faster and easier.

The lesson here is to not lock up logic inside your test code, perhaps with a goal of making tests self-contained, but instead build abstractions underneath your tests. These can can be put into test-specific APIs or even customer-facing APIs where appropriate.

3. Write tests as you write features, add tests as you fix bugs

A key aspect of automated testing is making it part of the team’s routine. For our team, there were two key points in our workflow where automated testing was required:

  1. First, when writing a feature, each developer was required to write automated unit and acceptance tests for that feature. This was included in our team’s “Definition of Done” as a baseline requirement.
  2. Second, when fixing a bug, we would expect each bug to have a test written that reproduced that bug. So you’d have a red test straight away, and then when the bug was fixed, the new test would pass.

There may have been the occasional exception, but these rules served us well in encouraging everyone to contribute to the automated testing work as we enhanced and fixed bugs in the product.

Having these two activities in our workflow was sufficient to drive the development of thousands of test cases over the decade or so I worked on the product. It’s critical that any team who is serious about automated testing make the development of tests an expected part of all feature development and bug fixing.

4. Peer review the feature, not just the code

The other part of our process that evolved over time was the review process. Like many teams, we used a peer code review process via pull request in Bitbucket (and formerly Crucible), so all code was reviewed prior to merging the code into the main branch. But this wasn’t the important bit.

In addition to code review, we had a stage in our Jira ticket workflow called “quality review”, which was about looking at the actual feature (or bug fix), making sure the feature was working properly. Another developer on the team actually had to try out your feature and make sure it worked properly.

Quality review proved really impactful in ensuring features were developed properly, not rushed out with bugs or obvious issues. It also had a side effect of improving our automated test coverage.

If the quality review developer found some obvious bugs with the feature, they would naturally wonder why the tests for the feature hadn’t caught the issue. And in this way, there was a second forcing function (in addition to the “Definition of Done” mentioned above) to catch inadequate automated tests prior to completing a feature.

Having a peer review process for feature quality (in addition to code quality), proved to be really valuable, not only for delivering higher quality features but also for identifying gaps in our acceptance test coverage.

5. Track then fix or remove flaky tests

The bane of any automated testing process is flaky tests. These waste developer time and reduce trust in the overall testing system.

Dealing with flaky tests requires three behaviours:

  1. Track them. Each flaky test should have a Jira ticket, and every time there is a build failure, you should pop a comment on the ticket. This makes it possible to track and prioritise flaky test failures based on how frequent they are.
  2. Fix them. Each iteration, schedule time to fix flaky tests or other painful aspects of your build system. Every team needs to allocate time to “sharpen the saw”, without which your development speed will eventually grind to a halt.
  3. Delete them. If, after spending a bit of time on a test, you cannot make it 100% reliable, then delete it. A flaky test is worse overall than some minor bugs in your product. You can always write a new test if you really need to, hopefully with less flakiness the second time around.

When fixing flaky tests, it is useful to apply tip #2 above, and aim to build APIs that systematically reduce flakiness. Often flakiness is due to timing issues. A test makes a change to the system, then the assertion which follows afterwards fails if the change takes too long. Or it fails if the change occurs too quickly.

In these cases, building APIs that allow the test code to reliably check for the change to the system, regardless of its timing, can fix flakiness not just in one test, but in all subsequent tests which do the same thing.

In my experience, the best solutions to flaky tests is a new test API, which can then be used by future test cases to avoid the same timing issues.

Putting your tests to use

Once you have a suite of reliable automated tests for your application, you will find many ways to put them to use. We used them in all these ways:

  • Developers run them locally to get feedback on their changes
  • CI runs them on development branches so devs get feedback before review
  • Release branches run a more comprehensive set, with some upgrade tests, to check all is good before we ship a self-hosted release
  • For cloud deployment, we ran a subset of “smoke tests” against “canary” instances to check that there was nothing amiss after an upgrade
  • We used them to create demo data for the marketing team
  • We converted some of them into performance tests so we could baseline and track our application performance over time.

The sky is really the limit once you have spent the time to automate the testing of your code.

Summary

So let’s wrap up the practical suggestions for expanding automated testing in your team:

  1. Start with acceptance (end-to-end) tests, not unit tests
  2. Write new APIs for use with automated tests
  3. Write tests as you write features, add tests as you fix bugs
  4. Peer review the feature, not just the code
  5. Track then fix or remove flaky tests

If you have any questions about testing processes, or how to get your team writing more automated tests, please get in touch.

Product-led growth lessons from Atlassian

Product-led growth, or PLG, has become a bit of a buzzword lately, and I’ve had a few people ask me about it in relation to their startup, and how we did things at Atlassian.

First, a quick definition of product-led growth, courtesy of Wes Bush:

Unlike sales-led companies where the whole goal is to take a buyer from Point A to Point B in a sales cycle, product-led companies flip the traditional sales model on its head. Product-led companies make this possible by giving the buyer the “keys” to use the product and helping them experience a meaningful outcome while using the product. At this point, upgrading to a paid plan becomes a no-brainer.

At Atlassian, this was how we sold our products from the start. Our typical evaluator was a developer or manager of a dev team, who had heard about Jira, Confluence, Trello, etc. and came to our website to get started with one of our products.

Perhaps it’s obvious, but it’s also worth pointing out why you might want product-led growth for your business. Having a product-led sales process means you can spend less on salespeople, and your business will start to grow organically over time, with a sustainable or even decreasing customer acquisition cost (CAC). Product-led growth enables the so-called “hockey stick graph” that internet startups love to show:

In theory, product-led growth will outperform in the long term

The rest of the article provides answers to the typical questions I hear from startups about how they can achieve product-led growth.

Can we apply product-led growth in other industries?

This one of the key questions about PLG – can it work in areas outside of SaaS, like real estate or hardware? Put another way, what are the prerequisites for a product-led growth model in terms of the product and market?

In my view, a product-led sales model is dependent on:

  1. A product which can be adopted self-serve, and
  2. An audience which actually prefer trying and buying their own products.

Back in the early ’00s, Atlassian had quite a revolutionary model for selling business software. They set a price which was affordable (starting at ~$1k per year), for products which were relatively full-featured, and easy for customers to set up by themselves. This covered off the first point.

The second one was addressed by the main “land” market for Atlassian’s products, software teams. Software people are happy to be early adopters of new products, because they like being seen as the computer experts by their friends.

It’s worth going into a bit more detail about how the adoption process works in a product-led model. The diagram below shows how it works:

  • Your product needs an internal champion, who has the idea of trying out your product and evaluating it.
  • Once they’ve fallen in love with it, they invite their colleagues, who use the product and give their approval back to the champion.
  • The champion uses their internal support to drive the process of purchasing and rolling out the product across the organisation.
Product-led growth diagram
Product-led growth internal adoption loop

This model has two great aspects that spur a product’s growth. First, the positive feedback that a successful champion gets within their company makes them more likely to introduce the product again in future roles. Second, the fact that not just the original user, but also the coworkers, have to adopt and approve of the product, expands the pool of users like to refer the product to others, driving your word-of-mouth marketing.

The positive feedback that a successful champion gets within their company makes them more likely to introduce the product again in future roles.

If you look at other areas, like real estate or hardware, there are many companies experimenting to see if product-led growth is possible. For example, Tesla is trying to disrupt the existing network of car sellers by selling direct to consumers. You can see how their marketing strategy is trying to support a set of “champions” who spread their brand through word-of-mouth.

Here are some of the questions I ask to help determine whether PLG is viable in a given market:

  • Who buys your product, and is it the same as the person using the product? Can you make it the same person, at least for the evaluation period?
  • Do your users enjoy trying out new products, like software people do? How can you make it easy for them to do so?
  • Who are going to be the internal champions for your product in an organisation? What job titles do they have, and how do they discover new products?

Differences between buyer and user, and users who are not comfortable trying out new products are the major sticking points you’d want to cover off with your early user testing.

How can we test and determine whether PLG is possible in our area?

My recommendation here is to look at the Lean Startup model, which tries to define a systematic approach to designing a minimal product for users and trying to get them to use it. Read Lean Startup by Eric Ries to get started.

Right from the beginning, you should be looking for early signs of the product being adopted self-serve by the target buyer. If you can see indications that this will work, then you need to double down on your product work to optimise optimise optimise that process. By contrast, if you always need to hand-hold the buyers through the process, regardless of how easy you make your product’s setup process, then it might not be possible to fit your business into the product-led model.

In terms of metrics, the most important ones are early stage funnel metrics. So you want to track your website visits, “try intents” (people who click a try button), signups, and every step through the setup process. Then you need to reach out to talk to the customers one-on-one, to get detailed feedback on their hurdles as they try the product. This could be via Intercom or just emailing people after they sign up.

Atlassian did not do much of this stuff in the early days because our software was downloaded originally, and the techniques were also not well described yet. Instead, our team build products we wanted to use, as we were software developers ourselves. We also had a public issue tracker where customers would raise feature requests, and the team leads used to review all the feedback, go back and forth with customers when implementing, and add features pretty rapidly.

Validating the potential for a product-led growth model needs a lot of leg-work. There is no substitute for talking to those people who have tried (and potentially failed) to adopt your new service, and working out how to get them past their initial hurdles. Even if you build something to scratch your own itch, you’ll need to quickly move from there to taking on feedback from real users.

How do you implement an upsell/cross-sell strategy in the product?

In terms of converting free customers to paid, Atlassian originally had a free 30 day trial for download products, and now offers “freemium” products in the cloud. Making the evaluation process free and very easy is important, and the price needs to be easily purchasable on a credit card. (This depends on your audience, but should probably be <$100 per month starting point for a typical paid team.)

For a freemium strategy to work, you have to identify features which are key to use of the product as it scales within a business. For many enterprise products, permission features are a natural fit here. Small teams can get by without them, but larger teams naturally need more support dividing up their work and restricting access to different bits of it.

Atlassian has tried many things for cross-sell, but the three strategies we saw working consistently were:

  1. Build useful integration features to ensure that the products work well together. Confluence and Jira both had features that connected the two products starting from 1.0, which made them a natural set to buy together.
  2. Bundle related products together as a default evaluation setup, e.g. Jira and Confluence. This is like how Microsoft used to sell Office as the bundle of Word + Excel + Powerpoint. We didn’t even discount (and still don’t, I believe), but people still bought them together because they worked well together.
  3. Suggest other products only when appropriate based on customer behaviour or data thresholds. For example, a Trello customer might see a “try Jira” popup once they hit >100 cards on a board or >10 boards. A Jira Software customer with a “support” ticket type might get a suggestion to try Jira Service Desk.

We tried a number of cross-sell marketing campaigns (e.g. emails to customers of our other products) but they had only limited success. For cross-sell emails to be successful, they need to arrive just when a customer is getting started with a product, or coincidentally when they happen to really need something. Just emailing them at random times was ineffective at best and annoying at worst.

It’s important to note that you shouldn’t focus on up-sell or cross-sell at all until you have a very successful product that customers are willing to buy. Especially in the case of cross-sell, each product needs to succeed or fail on its own terms as a product, and then cross-sell is a slight accelerator. You definitely don’t want to send your best customers to try out something that isn’t ready for prime time yet.

How do we structure and build an org that’s conducive to PLG?

I’d say it’s pretty typical for products now to be designed for PLG as the default. Things like:

  • You need to continually iterate on the user experience, so that your product is the absolute easiest and best way for the customer to achieve their goals.
  • You want to encourage deeply understanding the customers through analytics and interviews. How many users signed up each day? How did they hear about you? What feature did they try first? Why did they stop using the product?
  • You need product designers to design the entire flow for the end user, from website to signup to setup and using the product. You can’t have a separate team designing and building the website.

In my experience, most startup teams want to operate like the above, but they there are usually also areas to improve. Customer-centric product strategy and design coupled with a lean approach (“what is the minimum we can do to learn?”) is what you need to aim for.

In terms of concrete structures, Atlassian’s product teams are typically structured like this:

  • Product manager - in charge of product priorities, roadmap, customer interviews, etc.
  • Designer - designs the interface (and more recently the text)
  • Dev team lead - manages the backlog, bug fixing, interacts with support, etc.
  • 8-10 devs led by each “triad” above of PM/dev/design

Other roles are added on an as-needs basis, like product marketing, tech writing, QA, data analyst, etc. and usually work across multiple product teams.

Typical product team structure

When I started in 2006, we had two product dev teams for Jira and Confluence, but no PMs or designers yet. The founders were the de facto PMs, and each team had a dev lead. We added PMs as the founders needed to step away, and designers as design became more important to software over time.

How do we get the rest of the org to buy in? What are the right metrics to track?

As the question implies, some measurement of success, even in early stage metrics, helps get buy-in for this approach. If you can show a few dozen potential evaluators coming to the website, who convert into paying customers with a steady conversion rate, and start to lift those numbers over time, then you’ll have a working product-led growth engine.

Our founders and co-CEOs, Scott and Mike, used to track our eval and sales figures daily and weekly, because once this engine starts going, anything that’s unusual becomes quite obvious. Growth becomes the normal state of things. Scott’s priority was tracking new customer evaluations rather than conversion or existing customer renewals/expansion, as this is a true indicator of growth.

Good luck with product-led growth!

I’d love to hear about your experiences and challenges with product-led growth in your startup. Feel free to email me if you have further questions or suggestions to improve this article.

How to get started advising startups

A few people have asked me about my work with Startmate, Australia’s leading startup accelerator1, and how they can get involved with investing in or mentoring startups.

Today I wanted to answer this and share a bit about how I engage with startups as a mentor/advisor in Startmate.

Startmate All Hands, March 2019

How can you get involved?

A startup incubator is a great place to start because it provides a way to connect with the startups, filters them for quality, and allows you to invest as well.

I started with Startmate by applying to be a mentor, where I invested and joined to mentor the Melbourne cohort in 2018. Incubators/accelerators like Startmate work by the mentors putting money into a fund (minimum $10k per round), which is then invested in the startups.

Startmate also hosts “office hours” for mentors, which are 30 minute Zoom calls with founders arranged in a block. Participating as a mentor there can help build your network of founders and meet people outside the incubator.

Alternatively, you could advertise your availability as a mentor/advisor on LinkedIn. A few people have reached out to me on LinkedIn since I added startup advisor to my bio there.

Another approach is to find teams yourself and offer to help them out. One team I now advise I found initially via their YouTube videos. After a few chats and a visit, I offered to lead an angel investment for them.

When you reach out to an incubator or advertise yourself on LinkedIn, the first question you’ll be faced with is - what can startups learn from you?

Do you have relevant experience?

Startup founders want to learn from people who have been in the same situation before, or who can help them make progress quickly. The typical categories of startup advisors are:

  • Other founders - help with starting the business, hiring early employees, what to focus on/ignore.
  • Investors - help with identifying what the company needs to get venture funding (hint: a product with customers and revenue!), or by actually giving them money.
  • Domain experts - this could be people in a particular industry (e.g. doctors for a medical startup), or people with particular skills (e.g. CTOs for a software startup).

If you’re not a founder, an investor, or an expert in something immediately relevant to a startup, you should probably find something else to do with your time.

If you're not a founder, an investor, or an expert in something immediately relevant to a startup, you should probably find something else to do with your time.

In my case, I’ve found my experience as an early employee at Atlassian is occasionally useful, but not as useful as the experience of mentors who have actually been founders. So the main thing I bring is my skill with product and software development – helping teams identify their customer needs and working with devs to turn those into working, viable products.

The gotcha with having specific expertise like this is that you’ll need to spend a fair bit of time to get to know the startup and their industry, to make sure your advice is relevant. So the next question is whether you want to make that commitment or not.

Can you spare the time and focus?

Startup incubators often emphasise how little time it takes to be involved as a mentor, and they do a lot of work to make things easy for us. But I’ve found that I have to spend more than the minimum time to get the most out of mentoring, both for the startups and for myself.

I've found that I have to spend more than the minimum time to get the most out of mentoring, both for the startups and for myself.

My typical approach to mentoring in Startmate starts with the applications:

  • Reviewing applications (5-6h). I typically spend 5-6 hours one evening reviewing Startmate submissions and voting on them. This includes looking at websites, pitch views and reading details about dozens of teams to try to find the best ones. Startmate was getting over 200 applications when I was a mentor, but I could only review perhaps 20-30 in one night.
  • Interview Day. The most important event to attend for Startmate is Interview Day, where the top 30 teams who applied will attend (or meet over Zoom, more recently) to give their pitch to you. As a mentor, I find it helps to spend a bit of time in addition to the day itself.
    • Interview day prep (3-4h). The night before interview day, I look through my interview schedule and look up each team’s website or application. Then I jot down questions I can ask them so, rather a rehearsed pitch, we can jump straight into the meat. How many customers do they have? What is their go-to-market strategy? Which competitor are they most worried about? This takes 3-4 hours.
    • Attend interview day (3h). Interviewing 15 teams for 10 minutes each takes 3 hours, so this is gruelling but incredibly fun. During each interview, I take notes on good and bad aspects, looking for teams that are high functioning and going after a good opportunity. The key question: would I invest my own money in this company?
    • Send follow-up emails (2h). After interview day, I have usually found a couple of startups that I personally connected with. I jot some of my thoughts in an email and send it over to the founder, so they have some impartial feedback on their company, even if they don’t make it into the actual incubator. This takes about 1-2 hours to write and send 3-4 detailed emails.

By the time the teams are selected for inclusion in the cohort, I’ve usually worked out which teams I want to spend more time with. In the most recent cohort, Startmate introduced the idea of a “squad”, which were a designated group of mentors for each company. So in this round, the teams I focused on were my two squads, each with a weekly meeting, and three others I met with occasionally through the program.

Mentor activities throughout the program include:

  • Reading weekly updates. Each team send a weekly update on their progress, including metrics and good/bad/ugly happenings for their company. At the start of the program I read all of them, to get familiar with each team, and later on I focus on the ones I’m following most closely.
  • Squad meetings. The squads I participated in for Startmate MEL/NZ 2020 had weekly meetings for most of the program, and this was quite helpful for keeping up to date in Covid times, when we could only meet via Zoom.
  • Sending suggestions via email. My go-to format for sending feedback to founders is via email. It gives you a chance to spell out the situation you saw, your suggested tactics, and lets them consider your suggestions and reply and ask questions if needed.
  • Try out products and send feedback. As founders develop their products, they often drop links or examples in their email updates or a Slack channel. Going click-by-click through a team’s product and writing down your thoughts as you go is often invaluable for early stage products.
  • Chats with teams. As you send suggestions and feedback and build relationships with the teams, I’ve found they will start asking me for advice proactively. This is the real value of the program, when your experience as a mentor can really help teams move fast and avoid pitfalls that are obvious to you, but not to them.

In the past, when we had in-person cohorts, I also used to occasionally pop in to attend the weekly All Hands meetings, to learn about each team’s progress and meet with them before or after. I found this incidental face time with the teams really valuable.

As part of the Startmate program, there is also the option to share your expertise via a presentation to the cohort, but I’ve found 1:1 conversations to be the most effective way to engage with the teams with my background.

Altogether, mentoring as a product/dev advisor takes at least 2-3 hours per week to do all the above.

What are the benefits of mentoring?

If startup mentoring now seems like a lot of work, it is. But it’s rewarding too.

First, personally, it’s fun to make friends with people starting companies across a wide variety of industries. You can meet new people, learn about their challenges, and try to help them succeed. When they do succeed (and many of them do), you feel like you contributed to that success in some small way as well.

Second, you’re scaling your experience across many teams and helping them advance society in more ways than you can do as an individual. By helping build a community of entrepreneurs, which themselves return and help future entrepreneurs, you’re helping create thousands of world-class innovations now and in the future – to improve the world for everyone!

By helping build a community of entrepreneurs, which themselves return and help future entrepreneurs, you're helping create thousands of world-class innovations now and in the future -- to improve the world for everyone!

Lastly, but probably least important to me, there will eventually be a financial benefit for investing your money and effort in the program. Although no Startmate companies have made it to IPO yet, there have been some successful secondary sales and many are on the path to get there in the long term.

Good luck on your mentoring journey!

I hope this information is helpful in getting you started, and I look forward to seeing you soon at a Startmate or other startup event in our community.

If there are any mistakes above or additional things that should be included, or you have suggestions about other startup topics to write about, please shoot me an email.

  1. And, as of 2020, now also in NZ! 

Fixing videos without sound on 2nd generation Apple TV

I was trying to watch some TV episodes recently that wouldn’t play sound through my second generation Apple TV due to their audio encoding. Fixing them turned out not to be too hard, but working it out took a while, so here it is documented for posterity.

The MP4 video files had AC3 5.1 surround sound audio, shown as “AC3 (6 ch)” in Subler. However, the 2nd gen Apple TV only supports playing stereo audio over HDMI, and 5.1 audio only works via “pass through” on the optical output to an AV receiver (when enabled via Dolby Audio in the Apple TV settings). I don’t have an AV receiver or anything else hooked up to the optical port on my Apple TV. So playing these files on the Apple TV results in no sound being sent via HDMI, and no sound for me while watching these videos.

The fix is to reencode the audio as AAC stereo, while passing through the video and subtitle streams without modification. Install ffmpeg via Homebrew, then run the following command:

ffmpeg -y -i file.mp4 -map 0 -c:v copy -c:a aac -ac 2 -c:s copy file-fixed.mp4

The arguments are as follows:

  • -y – overwrites any existing output file
  • -i file.mp4 – input file
  • -map 0 – sends all streams from the first (and only) input file to the output file
  • -c:v copy – uses the “copy codec” for the video stream, which means pass it through unchanged
  • -c:a aac -ac 2 – uses the AAC codec for the audio stream, with just 2 audio channels
  • -c:s copy – copies the subtitle tracks (if any)
  • file-fixed.mp4 – the output filename.

Looping this over all my files fixed the soundtrack, which appeared afterwards as “AAC (2 ch)” in Subler. It also shaved about 100 MB off the file size of each. I was happily watching the TV episodes (with glorious stereo sound) on my old Apple TV soon after.

Credit to this Stack Overflow post for leading me down the right track.

Six small improvements in iOS 6

Continuous improvement is a big part of why I continue to buy and advocate Apple products. So after upgrading to iOS 6 on my iPhone 4S, I was curious to see what small things had been tweaked and changed across the OS.

More aggressive auto-dim

One of the first things I noticed after the upgrade was that the lock screen was noticeably dimmer when I first pressed a button to wake the phone up. I’m usually using my phone outdoors, so I typically have my phone configured with maximum brightness. After the upgrade, however, the lock screen definitely wasn’t at maximum brightness.

It appears that iOS 6 is more aggressive with the iPhone auto-dim setting, particularly when waking from sleep. For me, this is a small but noticeable improvement, because the screen is no longer so extremely bright when I wake my phone at nighttime to check the time.

This should also make for a slight improvement in battery life. If your phone is in your bag or pocket and jostling makes it wake up from time to time, the dimmer lock screen should result in less wasted battery.

Improved battery life

My iPhone also seems to be getting much better battery life now that it is running iOS 6. I used to finish a day of work with intermittent use of my phone at around 20-30% battery remaining. After upgrading to iOS 6, I’m seeing it more often at 50-60% at the end of the day.

This is great news for people like me, who occasionally forget to charge their phone overnight, and are left struggling through a second day trying to minimise phone use so the device doesn’t die.

New emoji

For what initially seemed just a gimmick to me – the introduction of emoji in iOS 5 – these little characters have started popping up everywhere. In text messages to my friends and family. In emails. Even in nicknames on the intranet at my work.

With iOS 6, Apple has added even more emoji to the system, including many new faces, foods, and other objects. Adding a bit of colour to your text messages just became even more fun.

Songs for alarms

I was starting to get tired of waking up to the same duck quacking, guitar strumming and blues piano chords. So it was really past time for Apple to support using songs from your music library as an alarm tone – a feature that other phones have had for years.

My advice? Just make sure you and your partner choose different songs for each day so you don’t feel like Bill Murray in Groundhog Day when “I Got You Babe” starts playing at 6:00 every morning.

Spelling correction for keyboard shortcuts

One of the nicest and least publicised features of iOS 5 was the addition of text expansions, known as “keyboard shortcuts” in Apple parlance. Found in Settings > General > Keyboard, you can configure as many shortcuts as you want. I have just one, a tweak to the one which is shipped by default: “omw” converts to “On my way” (without an exclamation mark).

In iOS 6, these shortcuts are now registered with the automatic spelling correction. So if I type “onw” by mistake, in my rush to wherever I’m going, iOS now corrects it and expands it to “On my way” correctly. Such a small change, but one which makes a big difference to me.

Panorama photos

While the last item on my list isn’t a small feature, it’s something I’ve found incredibly useful in the past week: panorama photos. There are plenty of sites that go into detail about how they work and provide stunning examples, but I’m just pleased to be able to capture a great photo of a vista while bushwalking or my surroundings in the city.

Expect to see panorama photos popping up everywhere now that Apple has put this tool into the hands of every amateur iPhone photographer.

Summary

Overall, I’m really happy with the upgrade to iOS 6. The controversial Maps update has not proved a problem to me in my usage so far, and all the little things above make using my phone a better experience.

Also: Three things about iOS 6

Why I use Firefox

After trying Chrome for a couple of weeks on my laptop, I’m back to Firefox again as my main browser for day-to-day and development use. The drawbacks of Chrome for my everyday browsing far outweighed the benefits in speed and development tools.

There are really just two reasons why I keep coming back to Firefox. I thought it might be useful to note them, and perhaps some browser developers might read this and get some feature ideas for their next version.

Awesome bar

The single best feature of Firefox and the number one reason why I continue to struggle with any other browser is Firefox’s aptly-named Awesome Bar. Unlike the smart address bars found in Chrome and Safari, Firefox’s has an uncanny ability to immediately suggest the page I’m looking for, after just typing a word or two.

While I don’t know all the details of how the Awesome Bar works internally, but some of the features that I find useful are immediately obvious when I try to use the smart address bar in Chrome.

Firstly, Firefox prioritises page history over web searches. Like everyone else, I do use the address bar to launch web searches, but when I do so I just hit enter – I don’t wait for the address bar menu to display a list of suggestions. Chrome seems to prioritise web search suggestions over pages that are in your history, which makes most of the options in the dropdown pretty useless to me in practice.

Below are two screenshots of what happens when I type ‘bootstrap’ in the Chrome and Firefox address bars, after having browsed the Twitter Bootstrap site several times in both browsers. Chrome shows three useless search suggestions, and Firefox lists out several pages that I’ve been to in the past and am fairly likely to be looking for.

Screenshot of Chrome's address bar search with irrelevant search suggestions
Chrome's address bar not-so-awesome search
Screenshot of Firefox's address bar with useful suggestions from my browsing history
Firefox's awesome bar with useful results from my history

Note also in the screenshot above, how Firefox gives me the option to switch to the “Examples” page which is open in an existing tab. When you have thirty or forty tabs open (as I frequently do – see below), being able to switch to an open tab instead of duplicating it is a great feature.

Secondly, Firefox’s Awesome Bar uses a combination of both the page title and the URL when matching against your browsing history, and it does substring matches on both. This means I can type something like ‘jira CONF macro’ and see a list of Confluence issues on our issue tracker containing the word ‘macro’ that I’ve been to recently. Chrome’s address bar seems to only search URLs, which is far less useful.

Another screenshot of Firefox's address bar with useful suggestions from my browsing history
Firefox awesome bar with JIRA issues I might be looking for

The most infuriating aspect of Chrome’s search suggestions is that they change after you’ve stopped typing. The most irritating example is this situation, which has happened to me several times:

  • you’re busy typing out some words which should match a page in your history
  • you see the page you want in the suggestions list, so you stop typing
  • as you go to use the cursor keys to select it, the suggestion disappears and gets replaced with useless suggestions from Google
  • you curse Google for making their suggestions feature so frustrating.

I consider the Awesome Bar among the most important productivity tools on my computer. When I was using Chrome, locating a page that would normally take me two or three seconds in Firefox would take minutes, often requiring navigating back through websites to the page I was reading earlier.

In Chrome, the address bar search seems hamstrung by Google’s desire to promote its search engine to the detriment of more relevant suggestions within the browsing history of the user.

Vertical tab tree

A large proportion of my work day consists of working with web applications and reading information on web sites. As such, I tend to accrue a large number of tabs in my browser. Horizontal UI components, like the typical tab bar in a web browser, are not designed to cope with a long list of items.

With Firefox, there’s an amazing extension called Tree-style tabs. This extension displays your tabs vertically on the left side of the window, where you can fit maybe 30-40 tabs, all with readable titles and icons on them. It also automatically nests tabs underneath each other, as you open a link in a new on a page you’re looking at. This helps group related tabs together in the list, as you open more and more of them.

Screenshot of my Firefox tab tree
Manageable tabs: Firefox tree-style tabs extension

Even with this extension, however, the situation isn’t all roses. Any browser with a lot of tabs open starts to consume a lot of memory, and every few days I need to restart Firefox to get it back to an acceptable level of performance. All my tabs are restored, but it seems the various slow memory leaks which accrue in the open windows are resolved by the restart.

The extension is also flakey in various ways, particularly when dragging tabs around. I have tried Chrome’s vertical tabs secret feature, but that doesn’t work very well currently. If there was another solution available anywhere else that provided similar functionality, I’d gladly try it out.

A related small improvement I’ve noticed in recent versions of Firefox is that it no longer attempts to reload all the tabs when you reopen your browser. This is a welcome improvement, particularly on slow connections, where the dozens of tabs you have open don’t use any bandwidth until you switch to them.

Looking forward

In the future, I hope the other browsers will catch up with similar productivity features. For someone who lives in their browser like I do, I can put up with a lot of other drawbacks for such significant features.

In particular, I would really like to use Chrome for a bunch of different reasons: the process-per-tab model, faster rendering, some more advanced developer tools, and its generally faster adoption of new web technologies.

Also: Ten things every web developer should know.

Three things about iOS 6

iOS 6 icon

Watching last week’s keynote at Apple’s WWDC conference, I was struck by how much Apple continues to make great iterative improvements to their software and hardware products. Particularly on the software side, this makes it great to be a consumer of their products. They ship a functional, and in some ways minimal, first version of a product, and then they continue to incrementally improve on it, year after year, until the result is something far superior to everything else on the market.

With that in mind, three of the improvements that excited me most in iOS 6 were things that most people probably dismiss as small unimportant tweaks, but they’re changes that I can see making a big difference to how I use my iOS devices every day.

iCloud tabs

iCloud tabs is the first improvement which solves a small problem I hit all the time. I’m browsing on my iPad over breakfast in the kitchen, then go into the office to do some work. As soon as I sit down at my computer, I remember that I need to finish reading that page I was reading on my iPad earlier. iCloud tabs provides a button in Safari and Mobile Safari to open up a page that is open on any of your other devices.

Screenshot of iCloud tabs menu in Mobile Safari on an iPad
iCloud tabs: get access to open web pages across your devices

Other browsers have tab synchronisation features, particularly across PCs, but I think this is a particularly elegant way of solving this problem between multiple different devices. You click the cloud button on your browser toolbar on any of your devices, and it shows you a list of the tabs currently open on any of your other devices. Neat.

Actions when declining phone calls

A common problem for all mobile phone owners is dealing with unwanted calls. Your pocket starts vibrating – or worse, ringing – while you’re talking with someone or sitting in a meeting.

The iPhone has always had a simple facility to dealing with this immediately, even when the phone is in your pocket. You can hit the sleep or volume-down button once to silence the call, and twice to decline it. The problem was that it was very easy to forget to return a call after you’ve declined it. For those like me who don’t use voicemail, or who have friends who won’t leave a message, this is particularly problematic.

In iOS 6, Apple adds a choice of actions you can perform when declining a call via the touchscreen. It gives you the following choices:

  • reply with message
  • remind me later.
Screenshot of new decline call options on an iPhone
New options when declining a call on your iPhone

The message option gives you a set of canned messages: “I’ll call you later”, “I’m on my way”, or “What’s up?”, as well as the ability to write a custom message. The reminder option can create a reminder for one hour, or one based on a geofence: current location, home, or work.

This is going to be incredibly useful to me when I need to decline a call at the office. Setting a reminder so I remember to call the person back after an hour, or sending Liz a message to tell her I’m leaving soon will be great.

Facebook calendar integration

The last feature I’m looking forward to is a component of one of the major features in the new OS: Facebook integration. My particular problem is that I’m occasionally accepting Facebook invites from friends to attend their events, but neglecting to add that event to my calendar. This leads to the situation where I plan to go away or double-book myself for an event I’ve already accepted.

I’m looking forward to having those Facebook events visible in the calendar on my phone, so I won’t accidentally make clashing appointments again in the future.

Summary

From the first time I saw the iPhone, presented by Steve Jobs in January 2007, I noticed so many small useful things that I was certain it was going to be the best phone for me. Aside from all the phone’s features, it was the clever behaviour of the device in a million different circumstances that won me over.

Apple continues on the same track with the updates in iOS 6. As well as a few large features, they’ve continued to improve the software in many ways that are going to help their customers every day. This focus on improvements that perfectly address the needs of their customers are why I continue to recommend the iPhone and iPad to everyone I speak with.

Related: How Apple views the web.

Stalingrad

Last week I finished a book that has been on my reading shelf for a very long time, Stalingrad by Antony Beevor. It’s an account of the epic and tragic siege of the city of Stalingrad (now Volgograd) in World War II.

The book opens with a gripping overview of Operation Barbarossa: Nazi Germany’s invasion of the Soviet Union which launched in June 1941. The Wehrmacht quickly overwhelmed the unprepared Soviet defenses and their tank armies rolled across the steppe in present day Ukraine, Belarus and Russia over the next few months.

Beevor’s skill is in tying the narrative of the campaign’s progress in with the personal writings and opinions of individuals involved in it:

In the first few days of Barbarossa, German generals saw little to change their low opinion of Soviet commanders, especially on the central part of the front. General Heinz Guderian, like most of his colleagues was struck by the readiness of Red Army commanders to waste the lives of their men in prodigious quantities. He also noted in a memorandum that they were severely hampered by the ‘political demands of the state leadership’, and suffered a ‘basic fear of responsibility’. … All this was true, but Guderian and his colleagues underestimated the desire within the Red Army to learn from its mistakes.

Very soon into the book though, the reader is faced with stories from the grim reality of war on the eastern front:

Contrary to all rules of war, surrender did not guarantee the lives of Red Army soldiers. On the third day of the invasion of the Ukraine, August von Kageneck, a reconnaissance troop commander with 9th Panzer Division, saw from the turret of his reconnaissance vehicle, ‘dead men lying in a neat row under the tree alongside a country lane, all in the same position – face down’. They had clearly not been killed in combat. …

Officers with traditional values were even more appalled when they heard of soldiers taking pot-shots at the columns of Soviet prisoners trudging to the rear. These endless columns of defeated men, hungry and above all thirsty in the summer heat, their brown uniforms and fore-and-aft pilotka caps covered in dust, were seen as little better than herds of animals.

Of course, there are equally awful stories of atrocities on both sides. After dealing with the background of Barbarossa and Operation Blue, the situation at Stalingrad starts to pan out.

Beevor’s detail here is helped by “a wide range of new material, especially from archives in Russia”, as he describes the situation in the city under siege:

‘The fighting assumed monstrous proportions beyond all possibility of measurement,’ wrote one of Chuikov’s officers. ‘The men in the communication trenches stumbled and fell as if on a ship’s deck during a storm.’ …

‘It was a terrible, exhausting battle’, wrote an officer in 14th Panzer Division, ‘on and below the ground, in ruins, cellars, and factory sewers. Tanks climbed mounds of rubble and scrap, and crept screeching through chaotically destroyed workshops and fired at point-blank range in narrow yards. Many of the tanks shook or exploded from the force of an exploding enemy mine.’ Shells striking solid iron installations in the factory workshops produced showers of sparks visible through the dust and smoke.

Despite ultimately only controlling only a narrow strip of land next to the Volga river, Chuikov’s 62nd Army managed to resist granting Stalingrad to the Germans. While the Germans’ attention was focused on claiming the prize of Stalingrad – the city bearing Stalin’s name – Soviet commanders Zhukov and Vasilevsky coordinated a massive counterattack and encirclement of the entire German Sixth Army, called Operation Uranus.

Again here, Beevor’s level of detail around happenings in Moscow and in the lead-up to Operation Uranus are impressive. He also has chilling anecdotes about the willful ignorance of the Nazi leadership:

During the summer, when Germany was producing approximately 500 tanks a month, General Halder had told Hitler that the Soviet Union was producing 1,200 a month. The Führer had slammed the table and said that is was simply not possible. Yet even this figure was far too low. In 1942, Soviet tank production was rising from 11,000 during the first six months to 13,600 during the second half of the year, an average of over 2,200 a month.

The German leadership’s ignorance of conditions on the ground proves to be its downfall, with strategic mishaps and miscommunications allowing the Soviet Union to strike back.

The Soviet armies easily overpowered the weak units on the flanks of the Sixth Army, and completely surrounded them around Stalingrad. The region containing the trapped army was called the Kessel, German for cauldron, and consisted of a staggering number of troops:

The Russians, despite all the air activity over the Kessel, still did not realise how large a force they had surrounded. Colonel Vinogradov, the chief of Red Army intelligence at Don Front headquarters, estimated that Operation Uranus had trapped around 86,000 men. The probably figure … was nearly three and a half times greater: close to 290,000 men.

Operation Uranus started in late November 1942, and by the time the Sixth Army was surrounded, it was in the depths of the Russian winter. The army was ravaged by the freezing weather, plunging to minus thirty degrees Celsius, as infrequent airlifts of supplies failed to provide the necessary amount of supplies to keep the men fed:

The bread ration was now down to under 200 grams per day, and often little more than 100 grams. The horseflesh added to ‘Wassersuppe’ came from local supplies. The carcasses were kept fresh by the cold, but the temperature was so low that meat could not be sliced from them with knives. Only a pioneer saw was strong enough.

The combination of cold and starvation meant that soldiers, when not on sentry, just lay in their dugouts, conserving energy. … In many cases, however, the lack of food led not to apathy but to crazed illusions, like those of ancient mystics who heard voices through malnutrition.

It is impossible to assess the numbers of suicides or deaths resulting from battle stress. Examples in other armies … rise dramatically when soldiers are cut off, and no army was more beleaguered than the Sixth Army at Stalingrad. Men raved wildly in their bunks, some lay there howling. Many, during a manic burst of activity, had to be overpowered or knocked senseless by their comrades.

The story is so powerful because it is real. From the Soviet prisoners of war left to starve in labour camps, to the anonymous wounded soldiers who are held back from departing planes by the sub-machine guns of the Feldgendarmerie, each page of this book reveals more from this awful chapter of humanity. It’s a story that must not be forgotten if it is to remain unrepeated.

I strongly recommend reading Stalingrad. It’s an epic and tragic story, but one that makes you appreciate the peace and safety that we enjoy today.

If you’d like to be updated when I next publish something here, you can follow me on Twitter.

The ideal iteration length, part 2

In my previous post on the ideal iteration length, I looked at how iteration length affected our development of Confluence at Atlassian. I also gave my definition of an iteration:

An iteration is the amount of time required to implement some improvements to the product and make them ready for a customer to use.

When I started at Confluence in 2006, getting improvements ready for customers only happened irregularly, and we were unlikely to have anything release-worthy until close to the end of each multi-month release cycle. Through 2008–2010, we worked on a system of regular two-week iterations with deployments to our internal wiki, called Extranet. Selected builds were released externally for testing as well. This worked well, but we were still looking to improve the process.

Moving faster

In early 2011, we started looking at how we could get internal deployments available more quickly from our development code stream. There were two main sticking points:

  1. Upgrading the internal server meant taking it offline for up to 10 minutes while the upgrade was done. This was usually done during the day, so the dev team would be around to help out with any problems, but was a bit more inconvenient for everyone else.
  2. The release process still involved a bunch of manual steps which meant that building a release took one or two days of a developer’s time.

The first problem was solved with some ingenuity from our developers. We managed to find a hack where we could disable certain features of the application and take a short-term performance impact in order to do seamless deployments between near-identical versions of the software. We had to intentionally exclude upgrades which included any significant data or schema changes, but that still allowed the majority of our internal micro-upgrades to be done without any downtime.

The second problem was solved just with more hard work on the automation front. We hired a couple of awesome build engineers, and over the course of a few months, they’d taken most of the hard work out of the release process. In the end, we had a Bamboo build which built a release for us with a single click.

Once these problems were resolved, we moved our team’s Confluence space on to its own server with the seamless deployment infrastructure. We have now been deploying Confluence there with every commit to our main development branch for more than a year.

The ability to have our team’s wiki running on the latest software all the time is incredible. It enables everyone in our team to test out new functionality on the instance, confident that they’re playing around with the latest code. It allows someone to make a quick change and see it deployed immediately in the team’s working area and see what kind of improvement it might make.

Bug fixing is transformed by the ability to deploy fixes as quickly as they’re implemented. If a serious problem arises due a deployment that just went out, it is often simpler and faster to develop a fix and roll that change out to the server. That reduces unnecessary work around rolling back the instance to its previous version, and shortens the feedback loop between deployment of a feature and the team discovering any problems with it. In the long term, we’ve found that this improves the quality of the software and encourages the team to consider deployment issues during development.

Atlassian’s Extranet wiki, used by the entire organisation, has just moved on to our seamless deployment platform. I’ll have to report back later on how that pans out, but we’re optimistic about how it will help us deliver faster improvements to the organisation.

One-week iterations and continuous deployment

Late in 2011, Atlassian launched a new hosted platform called OnDemand. One of the most significant improvements for us internally with the new platform was a great new deployment tool called HAL. HAL supported deploying a new release on to a given instance via a simple web interface, and could roll out upgrades to thousands of customers at a time very easily in the same manner.

The OnDemand team at Atlassian now has a weekly release cycle, which is primarily limited by our customer’s ability to tolerate downtime, rather than any technical limitation.

In the Confluence team, we’re aiming to push out new parcels of functionality to these customers on that same timeframe, reducing our iteration length from two weeks to one, and reducing the time to ship new functionality to customers from a few months down to a week.

We have some problems with moving to this faster iteration model:

  • making sure all the builds are green with the latest code sometimes takes a couple of days, meaning the release process needs to wait until we confirm everything is working
  • our deployment artifact is a big bundle of all our products, so if a bug is identified late in any of the products, deployment of all of them might be delayed
  • we’ll be releasing any code changes we make to thousands of customers every week, rather than just internally.

Each problem requires a distinct solution that we’re working through at the moment.

For the first, we’ll be trying to streamline and simplify our build system. In particular, we want to make the builds required to ensure the functionality is working on OnDemand much more reliable and streamlined.

On the second problem, we’re looking to decouple our deployment artifacts so the products can be deployed independently. We would like to go even further than the product level, so we can update individual plugins in the product or enable specific features through configuration updates as frequently as we like.

The final problem requires us to ensure our automated tests are up to scratch and covering every important area of the application. It’s important that we also continue to extend the coverage as we add new functionality – often a challenge with cutting edge functionality. The platform provides an extremely good backup and restore system, so we also have a good safety net in place in case there are any problems.

What are the benefits of moving to a faster or continuous deployment model? They’re very similar to the benefits we first saw with the move to a two-week iteration cycle, just bringing them now to our customers:

  • customers will see small improvements to the product appear as soon as they are ready
  • bugs can be identified and fixed sooner, and those fixes made available to customers sooner
  • we can deploy specific chunks of functionality to a limited set of customers or beta-testers to see how it works out
  • releases for installed (also called “behind the firewall”) customers will contain mostly features that have already been deployed in small chunks to all the customers in OnDemand, reducing the risk associated with these big-bang releases.

That sums up the work the team is doing right now, to try to make this all possible.

What is the ideal iteration length?

Back to the original question then: what is the ideal iteration length? Let’s consider the various types of customers we have, and what they might say.

We certainly have some customers who will want to be on the bleeding edge and trying out the latest features even though it means some inconsistencies or minor bugs occasionally. We certainly prefer to run our internal wiki that way. These customers want to have the changes released as soon as they’re implemented – as short an iteration length as possible.

On the other hand, there are customers, particularly those running their own instance of Confluence, who prefer to upgrade on a schedule of months or years. These customers want stability and consistency and would prefer to have fewer features if it means more of the other. For these customers, an iteration length of several months might be too fast.

Most of our customers sit somewhere in the middle of these two extremes.

What we’ve concluded after all this work is that the decision on speed of delivery should be in your customers’ hands. Your job as an engineering team is to ensure there is no technical reason why you can’t deliver the software as often as they’d like, even if that is as fast as you can commit some changes to source control.

That way, when your customers change their minds and want to get that fix or feature right now, there’s no reason why you have tell them no.

Thanks for reading today’s article. If you’d know when I write something next, you can follow me (@mryall) on Twitter.

The ideal iteration length, part 1

In the Confluence development team at Atlassian, we’ve played around with the length of iterations and release cycles a fair bit. We’ve always had the goal to keep them short, but just how short has varied over time and with interesting results.

The first thing you need to define when discussing iteration lengths is what constitutes an iteration. I define it as follows:

An iteration is the amount of time required to implement some improvements to the product and make them ready for a customer to use.

There are various areas of flexibility in this definition that will depend on what your team does and who the customer is. For some teams, the “customer” may be other staff inside the organisation, where you’re preparing an internal release for them each iteration. For some teams, the definition of “improvements” might need to be small enough that only a little bit of functionality is implemented each time.

In every case, an iteration has to have a deliverable, and ideally that deliverable should be a working piece of software which is complete and ready to use.

On top of the typically short “iteration cycle”, we have a longer “release cycle” for our products at Atlassian. This is to give features some time to mature through use internally, and helps us try out new ideas over a period of a few months before deciding whether something is ready to ship to our 10,000 or so customers.

Long (multi-month) iterations

When I first started at Atlassian in 2006, the release process for the team was built around a release with new features every 3–4 months. There were no real deliverables from the team along the way to building this, so in practice this was the iteration length. Occasionally, just prior to a new release, we’d prepare a beta release for customers to try out. But that was an irregular occurrence and not something we did as a matter of course.

There were a few problems with this approach:

  • the team didn’t have regular feedback on their progress
  • it was hard for internal stakeholders to see how feature development was progressing
  • features would often take longer than planned, requiring the planned released date to be pushed back.

You could say that the first two points actually led to the third, since the team and the management had little idea of their overall progress, it was easy for planned release dates to slip at the last minute.

Late in 2007, we tried to address these problems by introducing regular iterations with deliverables into our process.

Two-week iterations

Here’s what our team’s development manager wrote to the company when we started building a release of our software every two weeks and deploying it to our intranet wiki, called Extranet:

We are releasing Milestone releases to EAC every two weeks, usually on Wednesdays. This means that EAC always runs the latest hottest stuff, keeping everyone in the loop about what we are currently developing. Releasing regularly also helps the development team focussing on delivering production-ready software all the time - not just at the end of a release cycle. We aim at always providing top quality releases, and we are certainly not abusing EAC as a QA-center.

Along with this was a process for people to report issues, and some new upgrade and rollback procedures that we needed to make this feasible.

Basically, our team moved into a fairly strict two-week cycle for feature development. Every two weeks, we’d ensure all the features under development were in a stable enough state to build a “milestone” build. This milestone would be deployed to our intranet and made available to our customers via an “early access programme” (EAP).

Initially, this took a lot of work. When building features earlier, on a longer iteration cycle, we’d often be tempted to take the entire feature apart during development then put it back together over a period of months. This simply doesn’t work with two-week iterations, where the product needs to be up-and-running on a very important internal instance every two weeks.

The change was mostly one of culture, however. As we encouraged splitting up the features into smaller chunks which were achievable in two weeks, the process of building features this way became entrenched in the team. The conversations changed from “how are we going to get this ready in time?” to “what part of the feature should we build first?”

This two-weekly rhythm gave us the following benefits over a longer iteration period:

  • the team had a simple deadline to work towards – make sure your work is ready to ship on every second Wednesday
  • features were available early during development for the entire organisation to try out
  • issues with new features were identified sooner by the wider testing
  • the release process was standardised and practiced regularly
  • customers and plugin developers got access to our new code for testing purposes sooner
  • releases tend to hit on or very close to their planned dates, with reduction in scope when a given feature wasn’t going to be ready in time.

However, there also seemed to be some drawbacks with our new two-week iteration process:

  • large architectural changes struggled to get scheduled
  • large changes that couldn’t be shipped partially complete (like the backend conversion from wiki markup to XHTML) had to be done on a long-lived branch
  • the focus on short-term deliverables seemed to detract from longer term discussions like “are we actually building the right thing?”

Looking at each of these problems in detail, however, showed that none of them are actually directly related to the iteration length. They are actually problems with our development process that needed to be solved independently. The solutions to them probably deserve their own posts, so I’ll leave those topics for the moment.

As I mentioned above, there were some prerequisites for us to get to this point:

  • We needed a customer who was okay receiving changes frequently. It might take some convincing that releasing more frequently is better for them, but in the long run it really is!
  • We needed a process for communicating those changes: we published “milestone release notes” to the organisation every two weeks with the code changes.
  • We needed to standardise and document a milestone release and deployment process, which ideally as similar as possible to the full release process, but might take a few expedient shortcuts.
  • The software has to actually be ready to go each fortnight. This might need some badgering and nagging of the dev team to get them to wrap up their tasks a few days beforehand.
  • Lastly, we needed to assign a person responsible for doing the build and getting it live every two weeks. This role rotated among the developers in the team.

Our two-week iteration cycle served us extremely well in the Confluence team. We continued on this two-weekly rhythm of building and shipping milestones to our internal wiki and selected releases externally for testing for more than three years.

To be continued…

That’s it for today’s post. Next time, I’ll take a look at how we’ve attempted to decrease our iteration length further and what the results of that effort have been.

If you’d like to know when my next article is published, you can follow me (@mryall) on Twitter.

Portrait of Matt Ryall

About Matt

I’m a technology nerd, husband and father of four, living in beautiful Sydney, Australia.

My passion is building technology products that make the world a better place. In 2021, I started Mawson Rovers to develop robotics and software for space exploration. Prior to this, I led product teams at Atlassian to create collaboration tools for 15 years.

I'm also a startup advisor and investor, with an interest in advancing the Australian space industry. You can read more about my work on my LinkedIn profile.

blog@mattryall.net